In Case of Emergency ... Bug Out

Make a family emergency action plan. Don't just write it down, but use it. Practice your plan with your family members especially if you live in an area prone to natural disasters. I've included the plan I've made for my family, feel free to copy it or use it as a starting point for your own. It just makes good sense to be prepared.


FAMILY EMERGENCY ACTION PLAN

Evacuation

- Evacuate immediately if told to do so

- Listen to your radio/follow instructions

- Wear protective clothing/sturdy shoes

- Take your Bugout Bag

- Take the pets’ Bugout Bag

- Lock the house

- Use travel routes as directed—no shortcuts

If you’re sure you have time:

- Shut off water, gas, electricity if instructed

Contact Information

Important Telephone Numbers

- Home XXX-XXXX - Fulton Jr. High XXX-XXXX

- Family member Cell XXX-XXXX - Police Station XXX-XXXX

- Family member Cell XXX-XXXX - Fire Station 1 XXX-XXXX

- Family member Cell XXX-XXXX - Fire Station 2 XXX-XXXX

- Family member Cell XXX-XXXX - Family member Cell XXX-XXXX

- Work XXX-XXXX - Point of Contact XXX-XXX-XXXX

Important E-Mail Addresses

- If you are able to access e-mail contact Point of Contact (friend, family):

friend@gmail.com

family@gmail.com

Tell them where you are, your condition, and whether you’re in contact with other family members.

Remember…

  • Telephones (including cellular) may not work

  • Use your AM radio for incident updates

  • If telecommunications are down use the 2-way radio


2-Way (FRS) Radio Communications Plan

NOTE: Radios are preprogrammed to Channel XX, Privacy Code XX, simply turn it on.

Immediately following an incident relocate or remain at a safe location before doing anything else. Once you are physically safe:

1. Turn the radio on

2. Key the microphone and clearly say “Name Family (Your name) calling”

3. Unkey the microphone and listen for a reply

4. After a few seconds repeat your transmission

5. Continue the process as time permits until communications are established

6. If unable to establish communications, turn your radio off

* Repeat this process at the top of the hour and then every 15 minutes

* If no contact after 2 hours, repeat the process on the hour and at half past until contact is made. Keep trying and don’t get discouraged!

NOTE: Buildings, terrain, power lines, etc may degrade the radio. Try to transmit from open, flat ground.


Meeting Places

If we are unable to stay in our homes due to the emergency—and have not been directed to a specific location—go to the closest of the following:

  1. High School, or

  2. Junior High School, or

  3. Fire Station

    Choose several alternate locations. Check your local Chamber of Commerce for information about local emergency locations.

    If you are unable to reach one of these locations, or they are unsafe, try to find a public building (City Hall, Library, Post Office, School, etc.) or other safe, physically sound building.

    NOTE: Others may not be as well prepared as you are and may be desperate. Exercise caution, and avoid others if necessary.

Try to post easily read messages (cardboard signs, etc.) indicating where you are or where you’re going.


Bugout Bag

At a minimum your Bugout Bag should contain:

Family Emergency Action Cards Local map

FRS Radio with Instructions Knife

Clothes (underwear, pants, shirt, socks) Whistle

Lighter Ziploc bags

Emergency poncho Personal ID

Flashlight Personal papers (Thumb Drive)

Toothbrush with toothpaste Chemlights (5)

AM radio Can opener

First aid kit Notepad and pen

Emergency blanket Cash (notes and change)

Food Eating utensil(s)

Water Batteries

Firearm (depending on your location, and type of emergency)

NOTE: If you can confirm the safety of the source, refill your empty water bottle(s) as soon and as often as you can. Keep your bottles full. You MUST stay hydrated.


Remember…

Your Bugout Bag is ALL you have, is for YOUR USE ONLY, and is intended to last for the duration of the emergency. Use its contents sparingly and wisely. Do not expect to be resupplied!


So I decided to make some homemade soap. It's not difficult if you can follow directions and learn from my mistakes. The recipe I used included just 3 ingredients, soybean oil, sodium hydroxide (Lye) and water. Check out the videos I've linked here and then let me tell you what I did wrong so you don't make the same mistakes.

First, make sure the temperature of your oils are the same as your lye solution. I did it with the oil hotter than the lye and it wouldn't trace (check videos for what trace is). I did some research and found that if after a couple of hours of stirring your solution doesn't trace to go ahead and poor it into your mold (I used muffin molds) and wait to see if it solidify's on its own. I am now waiting to see if after a couple of weeks my muffin shaped soaps work but I am not holding my breath.

Second, ease the lye solution into the oil slowly. Don't just poor it into the oil all at once. I did this with my second batch and I think it didn't quick set correctly.

Third, ensure your soap batter will trace before adding any of your scents, coloring or other ingredients. I added several bags of pomegranate/green tea to the mix which just colored the soap an awful brown color. My kids say it looks like meatloaf ... I placed it into a mini bread tin as a mold. I decided to try and heat up the mixture to a bowl and then pull it off the stove and begin the stirring once again. It didn't take long before this mixture thickened up and I was able to get it to trace. I don't know if it will work yet, but its at least hardened into a nice meatloaf colored and shaped bar of super soap.

Check out these great videos on soap making. The first link includes how to make lye from scratch as well. I haven't tried that yet.

http://www.youtube.com/watch?v=ZuzCD7EP1ZM

http://www.youtube.com/watch?v=1MtzyxQiqKo

Use the following information to calculate your lye to oil ratios.

To use the following numbers, take the amount of fat you plan to use in your recipe (in ounces) and multiply it by the decimal number assigned to that type of fat. The resulting answer will be the amount of lye needed (in ounces). You can round your numbers up when you finish calculating them, but I'd wait and round up the whole thing after adding the numbers for each fat you are using in your recipe.) If you are combining fats, you can add the results of the calculations and see how close it comes to the standard 12 ounces of lye that come in a can (I don't like measuring lye crystals or having partial cans left over so the ideal recipe for me will use 12 ounces...if you are buying lye in bulk, this will not be a concern for you). Adjust your fats accordingly. At least 1/4 of your fat content should be a fat that is hard at room temperature but this is not written in stone. When designing your own recipe, a rule of thumb for the water used is approx. 1/3 of the total weight of the fats (in other words, add up the weight of the fats and oils and divide that by 3 for the ounces of water needed). Many people like to have a small cushion of extra fat in a recipe for mildness and usually strive for about 5-8%. Here is a list of most of the fats you might think to try in your soap, and a few others you may never want to use! ...

Saponification Numbers for Lye (Sodium Hydroxide)

Milder Column with a 5% Discount

Oil
Almond Oil (Sweet)
Apricot Kernel Oil
Avocado Oil
Babassu Oil
Bear Tallow
Beef Tallow
Bees Wax (white)
Brazil Nut Oil
Butterfat, Cow
Butterfat, Goat
Camellia Oil
Canola Oil
Castor Oil
Chicken Fat
Cocoa Butter
Coconut Oil
Cod Liver Oil
Corn Oil
Cottonseed Oil
Crisco/Veg. Shortening
Flaxseed Oil
Grapeseed Oil
Hazelnut Oil
Hemp Seed Oil
Java Cotton Oil
JoJoba Oil
Karite Butter (Shea)
Kukui Nut Oil
Lanolin (Wool Fat)
Lard
Macadamia Oil
Maize Oil
Old
.136
.135
.133
.175
.139
.140
.069
.175
.1619
.1672
.1362
.134
.1286
.1389
.137
.190
.1326
.136
.1386
.136
.1357
.1265
.1356
.1345
.137
.069
.128
.135
.0741
.138
.139
.136
Milder
.129
.128
.126
.166
.132
.133
.069*
.166
.154
.159
.129
.129
.125*
.132
.130
.1805
.126
.129
.132
.129
.129
.120
.129
.128
.130
.066
.122
.128
.070
.131
.132
.129
Oil
Mink Oil
Mustard Oil
Neat's Foot Oil
Neem Oil
Niger Seed Oil
Nutmeg Butter
Olive Oil
Olive Pomace Oil
Palm Butter
Palm Kernel Oil
Palm Oil
Peanut Oil
Perilla Oil
Poppyseed Oil
Pumpkinseed Oil
Rapeseed Oil
Rice Bran Oil
Ricinus Oil (Castor)
Safflower Oil
Sesame Seed Oil
Shea Butter
Shortening (Vegetable)
Soybean Oil
Sunflower Seed Oil
Tallow, Deer (Venison)
Tallow, Bear
Tallow, Beef
Tallow, Sheep (Mutton)
Tallow, Vegetable
Tallow, Goat
Walnut Oil
Wheatgerm Oil
Wool Fat (Lanolin)
Old
.140
.124
.136
.136
.135
.116
.134

.156
.156
.141
.136
.137
.138
.133
.134
.128
.129
.136
.133
.128
.136
.135
.134
.138
.139
.141
.138
.135
.138
.135
.131
.074
Milder
.133
.118
.129
.132
.129
.110
.128
.126
.148
.148
.134
.129
.130
.131
.126
.129*
.122
.125*
.129
.126
.122
.129
.128
.1275
.131
.132
.134
.131
.128
.131
.129
.124
.070

*Numbers higher than the 5% difference because it works better than dropping it down too much.

Portable Homemade Camp Stove

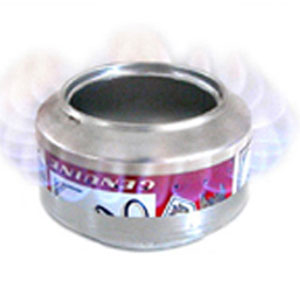
This portable stove is not too difficult to prepare and assemble using the special tools shown in the video and assembly techniques I have tried ensure consistency, quality and performance. After making several different types of alcohol stoves, I have settled on this design as the best combination for fuel economy and performance. I found the directions for this remarkable little stove on YouTube.

Don’t be fooled by the size and construction materials. These alcohol stoves are very rugged. This alcohol stove has no moving parts to wear out or break down. The construction process doesn't have to involve using high temperature epoxy to seal the pressure chamber if you follow the directions on the attached link. There are no slits on the side to weaken the alcohol stove and cause potential leaks like you will find on other designs. I have never had a leak with one of these alcohol stoves. In the case of a leak, seal the top and bottom pieces with 600 degree epoxy or some JB Weld.

The aluminum can alcohol stove is designed for denatured alcohol only. This is a readily available fuel that can be found in any hardware or paint store and at many outfitters. Rubbing alcohol works, but not as efficiently because it contains 30% water. Due to the location of the burn holes you can place your pot directly on the alcohol stove – without snuffing out the flame – thus eliminating the need for a pot stand.

Boil Rate: 2 cups of water in 5 minutes, 17 seconds on less than 1 ounce of fuel at sea level, 5 minutes, 7 seconds at 14,500′ msl.

Fuel: denatured alcohol

Directions to build your own pop can stove:

http://www.youtube.com/watch?v=C-35L_xdtQE

http://www.youtube.com/watch?v=NyosaAcwHXA&feature=related